How To Create Your First Helm Chart
For a typical cloud-native application with a 3-tier architecture, the diagram below illustrates how it might be described in terms of Kubernetes objects. In this example, each tier consists of a Deployment and Service object, and may additionally define ConfigMap or Secret objects. Each of these objects are typically defined in separate YAML files, and are fed into the kubectl command line tool.
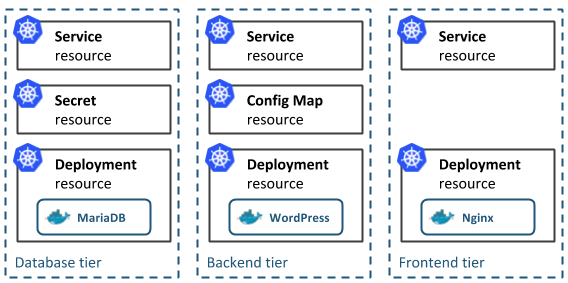
A Helm chart encapsulates each of these YAML definitions, provides a mechanism for configuration at deploy-time and allows you to define metadata and documentation that might be useful when sharing the package. Helm can be useful in different scenarios:
- Find and use popular software packaged as Kubernetes charts
- Share your own applications as Kubernetes charts
- Create reproducible builds of your Kubernetes applications
- Intelligently manage your Kubernetes object definitions
- Manage releases of Helm packages
Let’s explore the second and third scenarios by creating our first chart.
Generate Your First Chart
The best way to get started with a new chart is to use the helm create command to scaffold out an example we can build on. Use this command to create a new chart named admatic-chart in a new directory:
helm create admatic-chart
Creating admatic-chart
Helm will create a new directory in your project called admatic-chart with the structure shown below.
sudo apt update && sudo apt install tree -y

tree admatic-chart/
admatic-chart/
├── charts
├── Chart.yaml
├── templates
│   ├── deployment.yaml
│   ├── _helpers.tpl
│   ├── ingress.yaml
│   ├── NOTES.txt
│   ├── service.yaml
│   └── tests
│       └── test-connection.yaml
└── values.yaml

3 directories, 8 files
Templates
The most important piece of the puzzle is the templates/ directory. This is where Helm finds the YAML definitions for your Services, Deployments and other Kubernetes objects. If you already have definitions for your application, all you need to do is replace the generated YAML files for your own. What you end up with is a working chart that can be deployed using the helm install command.
It’s worth noting however, that the directory is named templates, and Helm runs each file in this directory through a Go template rendering engine. Helm extends the template language, adding a number of utility functions for writing charts. Open the service.yaml file to see what this looks like:
cat admatic-chart/templates/service.yaml
apiVersion: v1
kind: Service
metadata:
  name: { { include "admatic-chart.fullname" . } }
  labels:
    app.kubernetes.io/name: { { include "admatic-chart.name" . } }
    helm.sh/chart: { { include "admatic-chart.chart" . } }
    app.kubernetes.io/instance: { { .Release.Name } }
    app.kubernetes.io/managed-by: { { .Release.Service } }
spec:
  type: { { .Values.service.type } }
  ports:
    - port: { { .Values.service.port } }
      targetPort: http
      protocol: TCP
      name: http
  selector:
    app.kubernetes.io/name: { { include "admatic-chart.name" . } }
    app.kubernetes.io/instance: { { .Release.Name } }
This is a basic Service definition using templating. When deploying the chart, Helm will generate a definition that will look a lot more like a valid Service. We can do a dry-run of a helm install and enable debug to inspect the generated definitions:
helm install --dry-run --debug ./admatic-chart
[debug] Created tunnel using local port: '41373'

[debug] SERVER: "127.0.0.1:41373"

[debug] Original chart version: ""
[debug] CHART PATH: /home/adithya321/Documents/we-can-do-now/k8s/admatic-chart

NAME:   fuzzy-mite
REVISION: 1
RELEASED: Thu Jan  3 13:04:55 2019
CHART: admatic-chart-0.1.0
USER-SUPPLIED VALUES:
{}

COMPUTED VALUES:
affinity: {}
fullnameOverride: ""
image:
  pullPolicy: IfNotPresent
  repository: nginx
  tag: stable
ingress:
  annotations: {}
  enabled: false
  hosts:
  - chart-example.local
  paths: []
  tls: []
nameOverride: ""
nodeSelector: {}
replicaCount: 1
resources: {}
service:
  port: 80
  type: ClusterIP
tolerations: []


HOOKS:
---
# fuzzy-mite-admatic-chart-test-connection
apiVersion: v1
kind: Pod
metadata:
  name: "fuzzy-mite-admatic-chart-test-connection"
  labels:
    app.kubernetes.io/name: admatic-chart
    helm.sh/chart: admatic-chart-0.1.0
    app.kubernetes.io/instance: fuzzy-mite
    app.kubernetes.io/managed-by: Tiller
  annotations:
    "helm.sh/hook": test-success
spec:
  containers:
    - name: wget
      image: busybox
      command: ['wget']
      args:  ['fuzzy-mite-admatic-chart:80']
  restartPolicy: Never
MANIFEST:

---
# Source: admatic-chart/templates/service.yaml
apiVersion: v1
kind: Service
metadata:
  name: fuzzy-mite-admatic-chart
  labels:
    app.kubernetes.io/name: admatic-chart
    helm.sh/chart: admatic-chart-0.1.0
    app.kubernetes.io/instance: fuzzy-mite
    app.kubernetes.io/managed-by: Tiller
spec:
  type: ClusterIP
  ports:
    - port: 80
      targetPort: http
      protocol: TCP
      name: http
  selector:
    app.kubernetes.io/name: admatic-chart
    app.kubernetes.io/instance: fuzzy-mite
---
# Source: admatic-chart/templates/deployment.yaml
apiVersion: apps/v1
kind: Deployment
metadata:
  name: fuzzy-mite-admatic-chart
  labels:
    app.kubernetes.io/name: admatic-chart
    helm.sh/chart: admatic-chart-0.1.0
    app.kubernetes.io/instance: fuzzy-mite
    app.kubernetes.io/managed-by: Tiller
spec:
  replicas: 1
  selector:
    matchLabels:
      app.kubernetes.io/name: admatic-chart
      app.kubernetes.io/instance: fuzzy-mite
  template:
    metadata:
      labels:
        app.kubernetes.io/name: admatic-chart
        app.kubernetes.io/instance: fuzzy-mite
    spec:
      containers:
        - name: admatic-chart
          image: "nginx:stable"
          imagePullPolicy: IfNotPresent
          ports:
            - name: http
              containerPort: 80
              protocol: TCP
          livenessProbe:
            httpGet:
              path: /
              port: http
          readinessProbe:
            httpGet:
              path: /
              port: http
          resources:
            {}
Values
The template in service.yaml makes use of the Helm-specific objects .Chart and .Values. The former provides metadata about the chart to your definitions such as the name, or version. The latter .Values object is a key element of Helm charts, used to expose configuration that can be set at the time of deployment. The defaults for this object are defined in the values.yaml file. Try changing the default value for service.internalPort and execute another dry-run, you should find that the targetPort in the Service and the containerPort in the Deployment changes. The service.internalPort value is used here to ensure that the Service and Deployment objects work together correctly. The use of templating can greatly reduce boilerplate and simplify your definitions.
If a user of your chart wanted to change the default configuration, they could provide overrides directly on the command-line:
helm install --dry-run --debug ./admatic-chart --set service.internalPort=8080
[debug] Created tunnel using local port: '38017'

[debug] SERVER: "127.0.0.1:38017"

[debug] Original chart version: ""
[debug] CHART PATH: /home/adithya321/Documents/we-can-do-now/k8s/admatic-chart

NAME:   lumpy-skunk
REVISION: 1
RELEASED: Thu Jan  3 13:08:02 2019
CHART: admatic-chart-0.1.0
USER-SUPPLIED VALUES:
service:
  internalPort: 8080

COMPUTED VALUES:
affinity: {}
fullnameOverride: ""
image:
  pullPolicy: IfNotPresent
  repository: nginx
  tag: stable
ingress:
  annotations: {}
  enabled: false
  hosts:
  - chart-example.local
  paths: []
  tls: []
nameOverride: ""
nodeSelector: {}
replicaCount: 1
resources: {}
service:
  internalPort: 8080
  port: 80
  type: ClusterIP
tolerations: []
...
For more advanced configuration, a user can specify a YAML file containing overrides with the --values option.
Helpers and other functions
The service.yaml template also makes use of partials defined in _helpers.tpl, as well as functions like replace.
Documentation
Another useful file in the templates/ directory is the NOTES.txt file. This is a templated, plaintext file that gets printed out after the chart is successfully deployed. Since NOTES.txt is run through the template engine, you can use templating to print out working commands for obtaining an IP address, or getting a password from a Secret object.
Metadata
As mentioned earlier, a Helm chart consists of metadata that is used to help describe what the application is, define constraints on the minimum required Kubernetes and/or Helm version and manage the version of your chart. All of this metadata lives in the Chart.yaml file. The Helm documentation describes the different fields for this file.
Deploying Your First Chart
The chart you generated in the previous step is setup to run an NGINX server exposed via a Kubernetes Service. By default, the chart will create a ClusterIP type Service, so NGINX will only be exposed internally in the cluster. To access it externally, we’ll use the NodePort type instead. We can also set the name of the Helm release so we can easily refer back to it. Let’s go ahead and deploy our NGINX chart using the helm install command:
helm install --name example ./admatic-chart --set service.type=NodePort
NAME:   example
LAST DEPLOYED: Thu Jan  3 13:13:28 2019
NAMESPACE: default
STATUS: DEPLOYED

RESOURCES:
==> v1/Service
NAME                   TYPE      CLUSTER-IP    EXTERNAL-IP  PORT(S)       AGE
example-admatic-chart  NodePort  10.7.254.174  <none>       80:30764/TCP  1s

==> v1/Deployment
NAME                   DESIRED  CURRENT  UP-TO-DATE  AVAILABLE  AGE
example-admatic-chart  1        1        1           0          1s

==> v1/Pod(related)
NAME                                    READY  STATUS             RESTARTS  AGE
example-admatic-chart-56f4fc9bb4-jqzzd  0/1    ContainerCreating  0         1s


NOTES:
1. Get the application URL by running these commands:
  export NODE_PORT=$(kubectl get --namespace default -o jsonpath="{.spec.ports[0].nodePort}" services example-admatic-chart)
  export NODE_IP=$(kubectl get nodes --namespace default -o jsonpath="{.items[0].status.addresses[0].address}")
  echo http://$NODE_IP:$NODE_PORT
The output of helm install displays a handy summary of the state of the release, what objects were created, and the rendered NOTES.txt file to explain what to do next. Run the commands in the output to get a URL to access the NGINX service and pull it up in your browser.
export NODE_PORT=$(kubectl get --namespace default -o jsonpath="{.spec.ports[0].nodePort}" services example-admatic-chart)
echo $NODE_PORT
30764
Get external IP addresses of nodes
kubectl get nodes -o jsonpath='{ $.items[*].status.addresses[?(@.type=="ExternalIP")].address }'
35.232.43.157 35.226.116.253 104.154.32.120
curl 35.232.43.157:$NODE_PORT
curl 35.226.116.253:$NODE_PORT
curl 104.154.32.120:$NODE_PORT
<!DOCTYPE html>
<html>
  <head>
    <title>Welcome to nginx!</title>
    <style>
      body {
        width: 35em;
        margin: 0 auto;
        font-family: Tahoma, Verdana, Arial, sans-serif;
      }
    </style>
  </head>
  <body>
    <h1>Welcome to nginx!</h1>
    <p>
      If you see this page, the nginx web server is successfully installed and
      working. Further configuration is required.
    </p>

    <p>
      For online documentation and support please refer to
      <a href="http://nginx.org/">nginx.org</a>.<br />
      Commercial support is available at
      <a href="http://nginx.com/">nginx.com</a>.
    </p>

    <p><em>Thank you for using nginx.</em></p>
  </body>
</html>
Modify Chart To Deploy A Custom Service
The generated chart creates a Deployment object designed to run an image provided by the default values. This means all we need to do to run a different service is to change the referenced image in values.yaml.
We are going to update the chart to run a todo list application available on Docker Hub. In values.yaml, update the image keys to reference the todo list image:
vim admatic-chart/values.yaml
image:
  repository: prydonius/todo
  tag: 1.0.0
  pullPolicy: IfNotPresent
As you develop your chart, it’s a good idea to run it through the linter to ensure you’re following best practices and that your templates are well-formed. Run the helm lint command to see the linter in action:
helm lint ./admatic-chart
==> Linting ./admatic-chart
[INFO] Chart.yaml: icon is recommended

1 chart(s) linted, no failures
The linter didn’t complain about any major issues with the chart, so we’re good to go. However, as an example, here is what the linter might output if you managed to get something wrong:
echo "malformed" >> admatic-chart/values.yaml
helm lint ./admatic-chart
==> Linting ./admatic-chart
[INFO] Chart.yaml: icon is recommended
[ERROR] values.yaml: unable to parse YAML
        error converting YAML to JSON: yaml: line 49: could not find expected ':'

Error: 1 chart(s) linted, 1 chart(s) failed
This time, the linter tells us that it was unable to parse my values.yaml file correctly. With the line number hint, we can easily find the fix to the bug we introduced.
Delete line number 49
sed -i '49d' admatic-chart/values.yaml
helm lint ./admatic-chart
==> Linting ./admatic-chart
[INFO] Chart.yaml: icon is recommended

1 chart(s) linted, no failures
Now that the chart is once again valid, run helm install again to deploy the todo list application:
helm install --name todo ./admatic-chart --set service.type=NodePort
NAME:   todo
LAST DEPLOYED: Thu Jan  3 13:31:49 2019
NAMESPACE: default
STATUS: DEPLOYED

RESOURCES:
==> v1/Deployment
NAME                DESIRED  CURRENT  UP-TO-DATE  AVAILABLE  AGE
todo-admatic-chart  1        1        1           0          1s

==> v1/Pod(related)
NAME                                READY  STATUS             RESTARTS  AGE
todo-admatic-chart-7f47b69b8-tlcqq  0/1    ContainerCreating  0         1s

==> v1/Service
NAME                TYPE      CLUSTER-IP   EXTERNAL-IP  PORT(S)       AGE
todo-admatic-chart  NodePort  10.7.253.76  <none>       80:32167/TCP  1s


NOTES:
1. Get the application URL by running these commands:
  export NODE_PORT=$(kubectl get --namespace default -o jsonpath="{.spec.ports[0].nodePort}" services todo-admatic-chart)
  export NODE_IP=$(kubectl get nodes --namespace default -o jsonpath="{.items[0].status.addresses[0].address}")
  echo http://$NODE_IP:$NODE_PORT
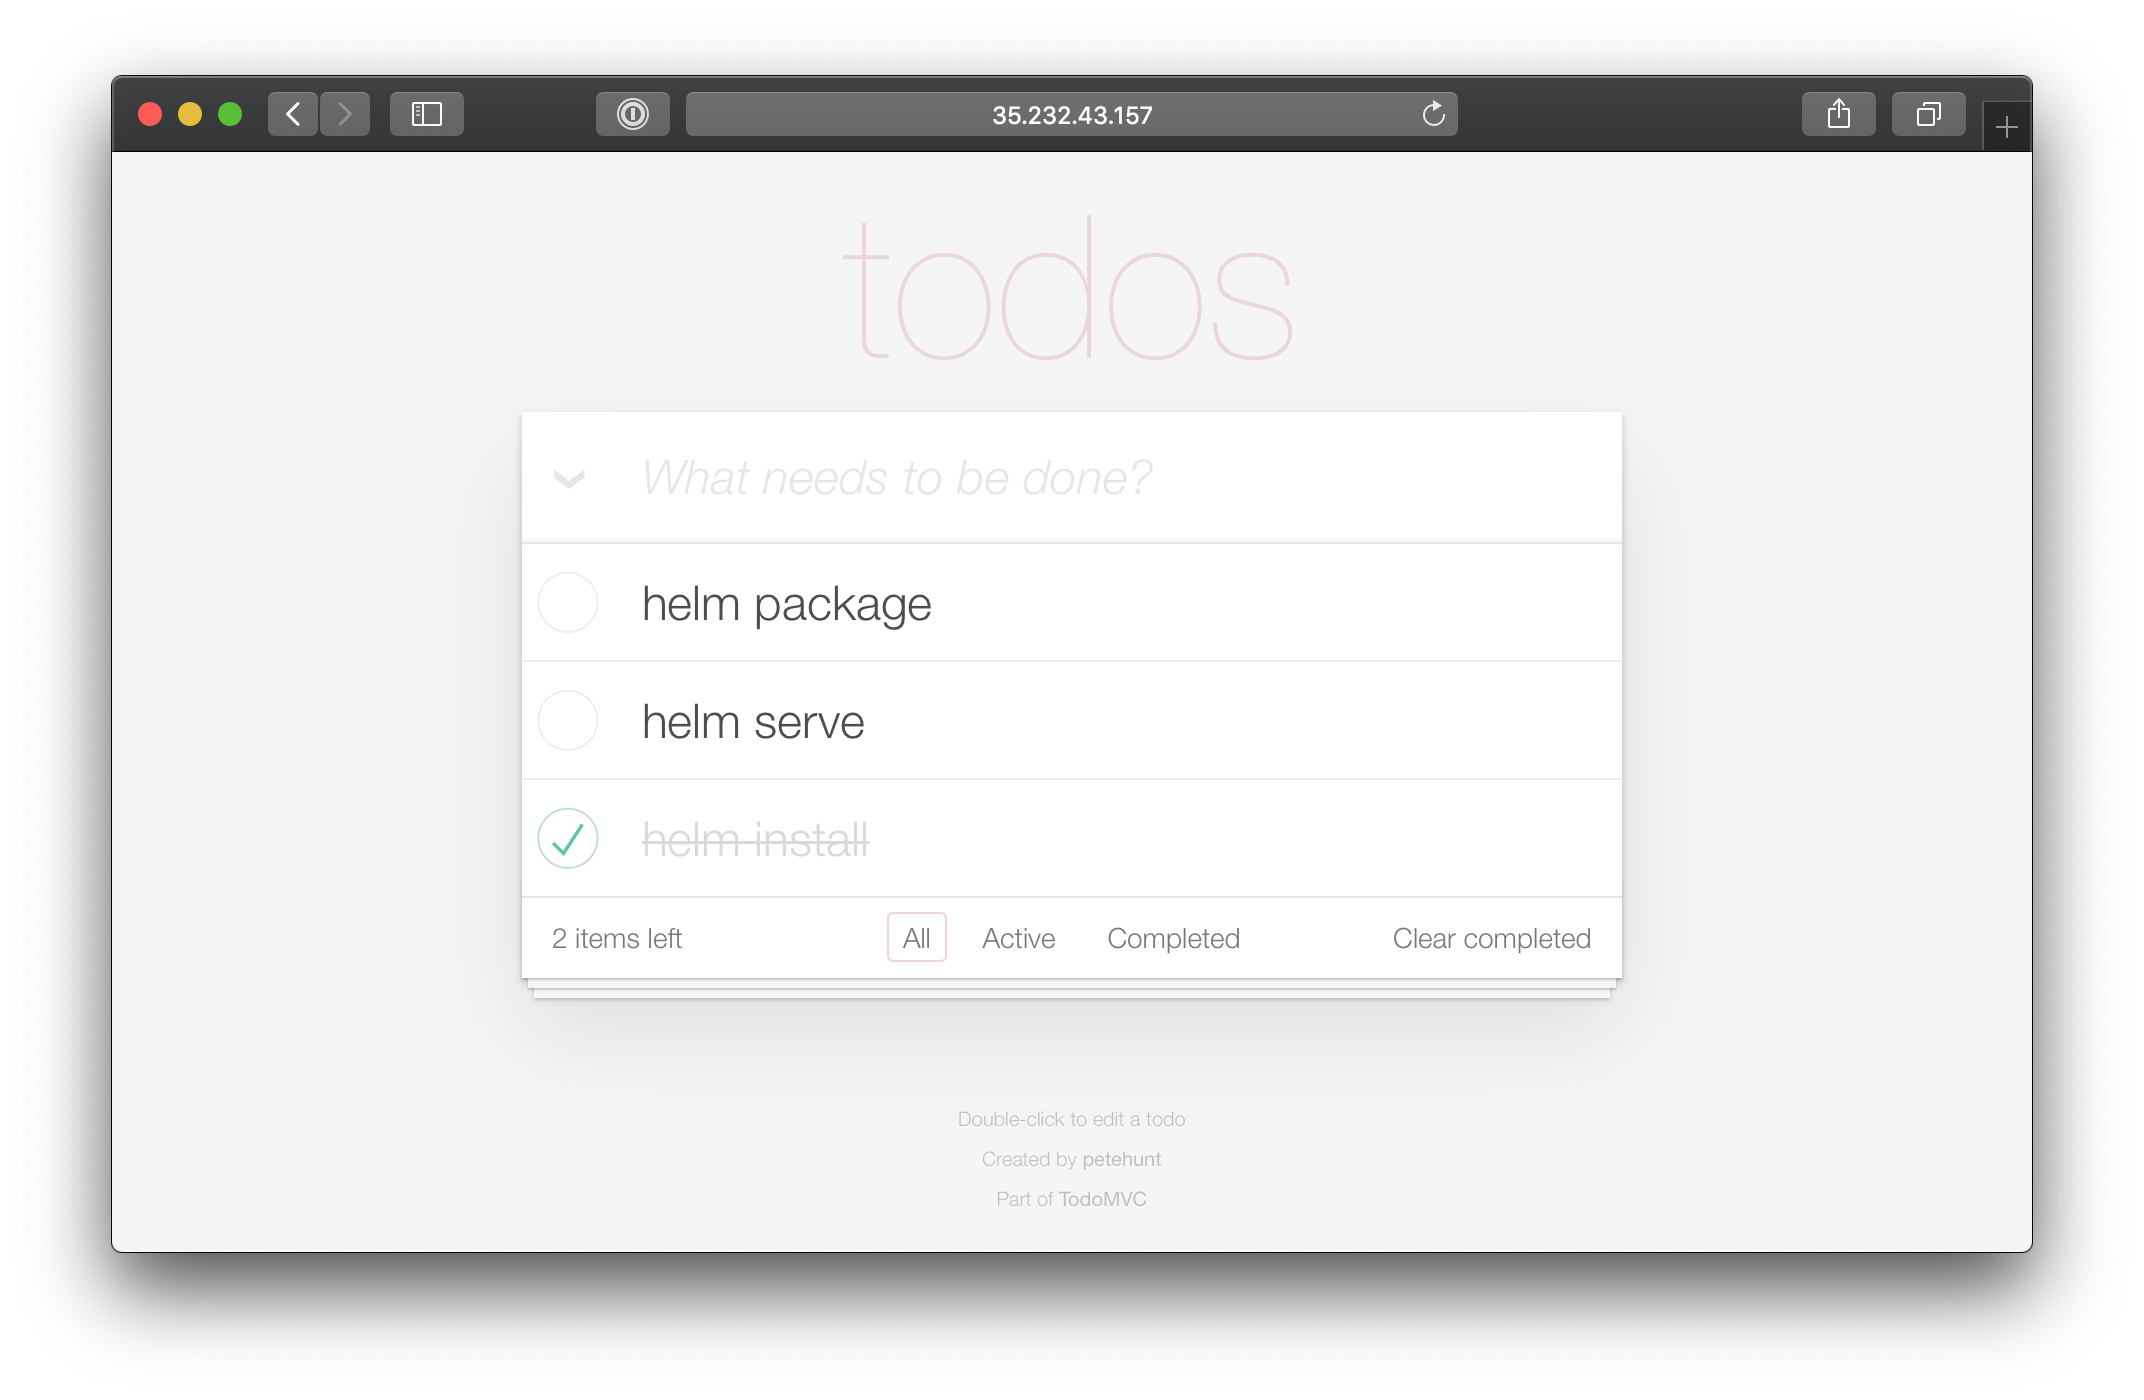
Once again, we can run the commands in the NOTES to get a URL to access our application.
export NODE_PORT=$(kubectl get --namespace default -o jsonpath="{.spec.ports[0].nodePort}" services todo-admatic-chart)
echo $NODE_PORT
30334
Get external IP addresses of nodes
kubectl get nodes -o jsonpath='{ $.items[*].status.addresses[?(@.type=="ExternalIP")].address }'
35.232.43.157 35.226.116.253 104.154.32.120
curl 35.232.43.157:$NODE_PORT
<!doctype html>
<html lang="en" data-framework="react">
        <head>
                <meta charset="utf-8">
                <title>React • TodoMVC</title>
                <link rel="stylesheet" href="node_modules/todomvc-common/base.css">
                <link rel="stylesheet" href="node_modules/todomvc-app-css/index.css">
        </head>
        <body>
                <section class="todoapp"></section>
                <footer class="info">
                        <p>Double-click to edit a todo</p>
                        <p>Created by <a href="http://github.com/petehunt/">petehunt</a></p>
                        <p>Part of <a href="http://todomvc.com">TodoMVC</a></p>
                </footer>

                <script src="node_modules/todomvc-common/base.js"></script>
                <script src="node_modules/react/dist/react-with-addons.js"></script>
                <script src="node_modules/classnames/index.js"></script>
                <script src="node_modules/react/dist/JSXTransformer.js"></script>
                <script src="node_modules/director/build/director.js"></script>

                <script src="js/utils.js"></script>
                <script src="js/todoModel.js"></script>
                <!-- jsx is an optional syntactic sugar that transforms methods in React's
                `render` into an HTML-looking format. Since the two models above are
                unrelated to React, we didn't need those transforms. -->
                <script type="text/jsx" src="js/todoItem.jsx"></script>
                <script type="text/jsx" src="js/footer.jsx"></script>
                <script type="text/jsx" src="js/app.jsx"></script>
        </body>
</html>
Packaging It All Up To Share
If you are looking to share your charts with your team or the community, your consumers will typically install the charts from a tar package. We can use helm package to create the tar package:
helm package ./admatic-chart
Helm will create a admatic-chart-0.1.0.tgz package in our working directory, using the name and version from the metadata defined in the Chart.yaml file.
Successfully packaged chart and saved it to: /home/adithya321/Documents/we-can-do-now/k8s/admatic-chart-0.1.0.tgz
A user can install from this package instead of a local directory by passing the package as the parameter to helm install.
helm install --name todo-package admatic-chart-0.1.0.tgz --set service.type=NodePort
NAME:   todo-package
LAST DEPLOYED: Thu Jan  3 13:44:54 2019
NAMESPACE: default
STATUS: DEPLOYED

RESOURCES:
==> v1/Pod(related)
NAME                                        READY  STATUS             RESTARTS  AGE
todo-package-admatic-chart-f99d94b6c-zwnxf  0/1    ContainerCreating  0         1s

==> v1/Service
NAME                        TYPE      CLUSTER-IP   EXTERNAL-IP  PORT(S)       AGE
todo-package-admatic-chart  NodePort  10.7.243.22  <none>       80:32633/TCP  1s

==> v1/Deployment
NAME                        DESIRED  CURRENT  UP-TO-DATE  AVAILABLE  AGE
todo-package-admatic-chart  1        1        1           0          1s


NOTES:
1. Get the application URL by running these commands:
  export NODE_PORT=$(kubectl get --namespace default -o jsonpath="{.spec.ports[0].nodePort}" services todo-package-admatic-chart)
  export NODE_IP=$(kubectl get nodes --namespace default -o jsonpath="{.items[0].status.addresses[0].address}")
  echo http://$NODE_IP:$NODE_PORT
Repositories
In order to make it much easier to share packages, Helm has built-in support for installing packages from an HTTP server. Helm reads a repository index hosted on the server which describes what chart packages are available and where they are located. This is how the default stable repository works.
We can use the helm serve command to run a local repository to serve our chart.
helm serve
Regenerating index. This may take a moment.
Now serving you on 127.0.0.1:8879
Now, in a separate terminal window, you should be able to see your chart in the local repository and install it from there:
helm search local
NAME                    CHART VERSION   APP VERSION     DESCRIPTION
local/admatic-chart     0.1.0           1.0             A Helm chart for Kubernetes
stable/magic-ip-address 0.1.0           0.9.0           A Helm chart to assign static IP addresses for node-local...
helm install --name todo-repo local/admatic-chart --set service.type=NodePort
NAME:   todo-repo
LAST DEPLOYED: Thu Jan  3 13:47:37 2019
NAMESPACE: default
STATUS: DEPLOYED

RESOURCES:
==> v1/Service
NAME                     TYPE      CLUSTER-IP    EXTERNAL-IP  PORT(S)       AGE
todo-repo-admatic-chart  NodePort  10.7.244.165  <none>       80:30302/TCP  0s

==> v1/Deployment
NAME                     DESIRED  CURRENT  UP-TO-DATE  AVAILABLE  AGE
todo-repo-admatic-chart  1        1        1           0          0s

==> v1/Pod(related)
NAME                                     READY  STATUS             RESTARTS  AGE
todo-repo-admatic-chart-5c9685665-587p5  0/1    ContainerCreating  0         0s


NOTES:
1. Get the application URL by running these commands:
  export NODE_PORT=$(kubectl get --namespace default -o jsonpath="{.spec.ports[0].nodePort}" services todo-repo-admatic-chart)
  export NODE_IP=$(kubectl get nodes --namespace default -o jsonpath="{.items[0].status.addresses[0].address}")
  echo http://$NODE_IP:$NODE_PORT
To setup a remote repository you can follow the guide in the Helm documentation.
Dependencies
As the applications your packaging as charts increase in complexity, you might find you need to pull in a dependency such as a database. Helm allows you to specify sub-charts that will be created as part of the same release. To define a dependency, create a requirements.yaml file in the chart root directory:
cat << EOF > ./admatic-chart/requirements.yaml
dependencies:
  - name: mariadb
    version: 0.6.0
    repository: https://kubernetes-charts.storage.googleapis.com
EOF
Much like a runtime language dependency file (such as Python’s requirements.txt), the requirements.yaml file allows you to manage your chart’s dependencies and their versions. When updating dependencies, a lockfile is generated so that subsequent fetching of dependencies use a known, working version. Run the following command to pull in the MariaDB dependency we defined:
helm dep update ./admatic-chart
Hang tight while we grab the latest from your chart repositories...
...Successfully got an update from the "local" chart repository
...Successfully got an update from the "stable" chart repository
Update Complete. ⎈Happy Helming!⎈
Saving 1 charts
Downloading mariadb from repo https://kubernetes-charts.storage.googleapis.com
Deleting outdated charts
ls admatic-chart/charts
mariadb-0.6.0.tgz
Helm has found a matching version in the stable repository and has fetched it into the chart's sub-chart directory. Now when we go and install the chart, we’ll see that MariaDB’s objects are created too:
helm install --name maria-dep ./admatic-chart --set service.type=NodePort
NAME:   maria-dep
LAST DEPLOYED: Thu Jan  3 13:53:44 2019
NAMESPACE: default
STATUS: DEPLOYED

RESOURCES:
==> v1/Service
NAME                     TYPE       CLUSTER-IP   EXTERNAL-IP  PORT(S)       AGE
maria-dep-mariadb        ClusterIP  10.7.244.7   <none>       3306/TCP      1s
maria-dep-admatic-chart  NodePort   10.7.241.46  <none>       80:31116/TCP  1s

==> v1beta1/Deployment
NAME               DESIRED  CURRENT  UP-TO-DATE  AVAILABLE  AGE
maria-dep-mariadb  1        1        1           0          1s

==> v1/Deployment
NAME                     DESIRED  CURRENT  UP-TO-DATE  AVAILABLE  AGE
maria-dep-admatic-chart  1        1        1           0          1s

==> v1/Pod(related)
NAME                                      READY  STATUS             RESTARTS  AGE
maria-dep-mariadb-fdf4665cb-shw4p         0/1    Pending            0         1s
maria-dep-admatic-chart-57ff5654c4-rqnmt  0/1    ContainerCreating  0         1s

==> v1/Secret
NAME               TYPE    DATA  AGE
maria-dep-mariadb  Opaque  2     1s

==> v1/ConfigMap
NAME               DATA  AGE
maria-dep-mariadb  1     1s

==> v1/PersistentVolumeClaim
NAME               STATUS   VOLUME    CAPACITY  ACCESS MODES  STORAGECLASS  AGE
maria-dep-mariadb  Pending  standard  1s


NOTES:
1. Get the application URL by running these commands:
  export NODE_PORT=$(kubectl get --namespace default -o jsonpath="{.spec.ports[0].nodePort}" services maria-dep-admatic-chart)
  export NODE_IP=$(kubectl get nodes --namespace default -o jsonpath="{.items[0].status.addresses[0].address}")
  echo http://$NODE_IP:$NODE_PORT
Contribute To The Stable Repository
One of the advantages of Helm is its great set of community contributed charts that you can install with a single command. As a chart author, you can help to build out the stable repository by improving existing charts or submitting new ones. Checkout https://kubeapps.com to see what’s currently available.